WIGI HAIR EXTENSIONS

Bring BEAUTY to your life

Trending Hairstyle Ideas for 2024: Chic and Stylish Looks

hairstyel 2024 ideas

Trending Hairstyle Ideas for 2024: Chic and Stylish Looks

Introduction:

As we step into 2024, it's the perfect time to revamp your hairstyle game and embrace new trends that promise to elevate your look. Whether you're gearing up for a night out, a party, or simply want to experiment with different styles, this blog has got you covered. Read on for a curated list of hairstyle inspirations that will keep you ahead of the fashion curve this year.

Party-Perfect Waves:

  • Heading to a party and want a hairstyle that exudes glamour? Consider opting for loose, tousled waves. This timeless look effortlessly combines sophistication with a touch of playfulness. Use a curling wand to achieve those soft waves, and don't forget to finish with a light-hold hairspray to maintain the bounce throughout the night.

1. Preparation:

  • Start with freshly washed and conditioned hair. Clean hair provides a smooth canvas for styling, and the waves tend to hold better.
  • Heat Protectant: Apply a heat protectant throughout your hair, focusing on the mid-lengths and ends. This helps to shield your hair from the heat of styling tools, reducing the risk of damage.

2. Choosing the Right Curling Iron:

  • Choose a curling iron with a barrel size that aligns with the type of waves you want. Larger barrels, like 1.5 inches, create loose waves, while smaller barrels, around 0.75 to 1 inch, result in tighter waves.

3. Curling Technique:

  • Section your hair: Divide your hair into manageable sections. Clip or tie away the hair you're not currently working on to avoid confusion.
  • Hold the curling iron vertically for a more natural-looking wave.
  • Leaving Ends Out: For a modern, relaxed finish, leave the ends of your hair out of the curling iron. This prevents a too-perfect or overly-styled appearance.
  • Hold Time: Hold each section on the curling iron for about 5-10 seconds, adjusting based on your hair's thickness and the heat level of your styling tool.

4. Alternating Directions:

  • Curl sections in alternating directions to mimic the natural flow of waves. This prevents the curls from grouping together and creates a more effortless look.

5. Setting with Hairspray:

  • After curling each section, mist it with a flexible hold hairspray. Hold the hairspray at least 12 inche;s away from your head to avoid stiffness.

6. Repeating the Process:

  • Work through each section methodically, ensuring that you curl all parts of your hair consistently.

7. Cooling Period:

  • Allow your hair to cool completely before touching it. This sets the waves and helps them last longer.

8. Creating Volume:

  • Gently run your fingers through your cooled hair to separate the waves and create volume. If you want a more polished look, use a wide-tooth comb.
  • Adjust the heat setting and styling technique based on your hair type. Fine hair may require lower heat to avoid damage, while thicker hair may need a bit more heat for lasting waves.
  1. Final Touches:
  • Add any additional styling products you like, such as a shine spray or a bit more hairspray for hold. You can enhance your look with accessories like hair clips, headbands, or even a stylish hat for a party-ready vibe.
  • If you want your waves to last, sleep with your hair loosely tied or use a silk pillowcase to prevent frizz.

Sleek High Ponytail for a Night Out:

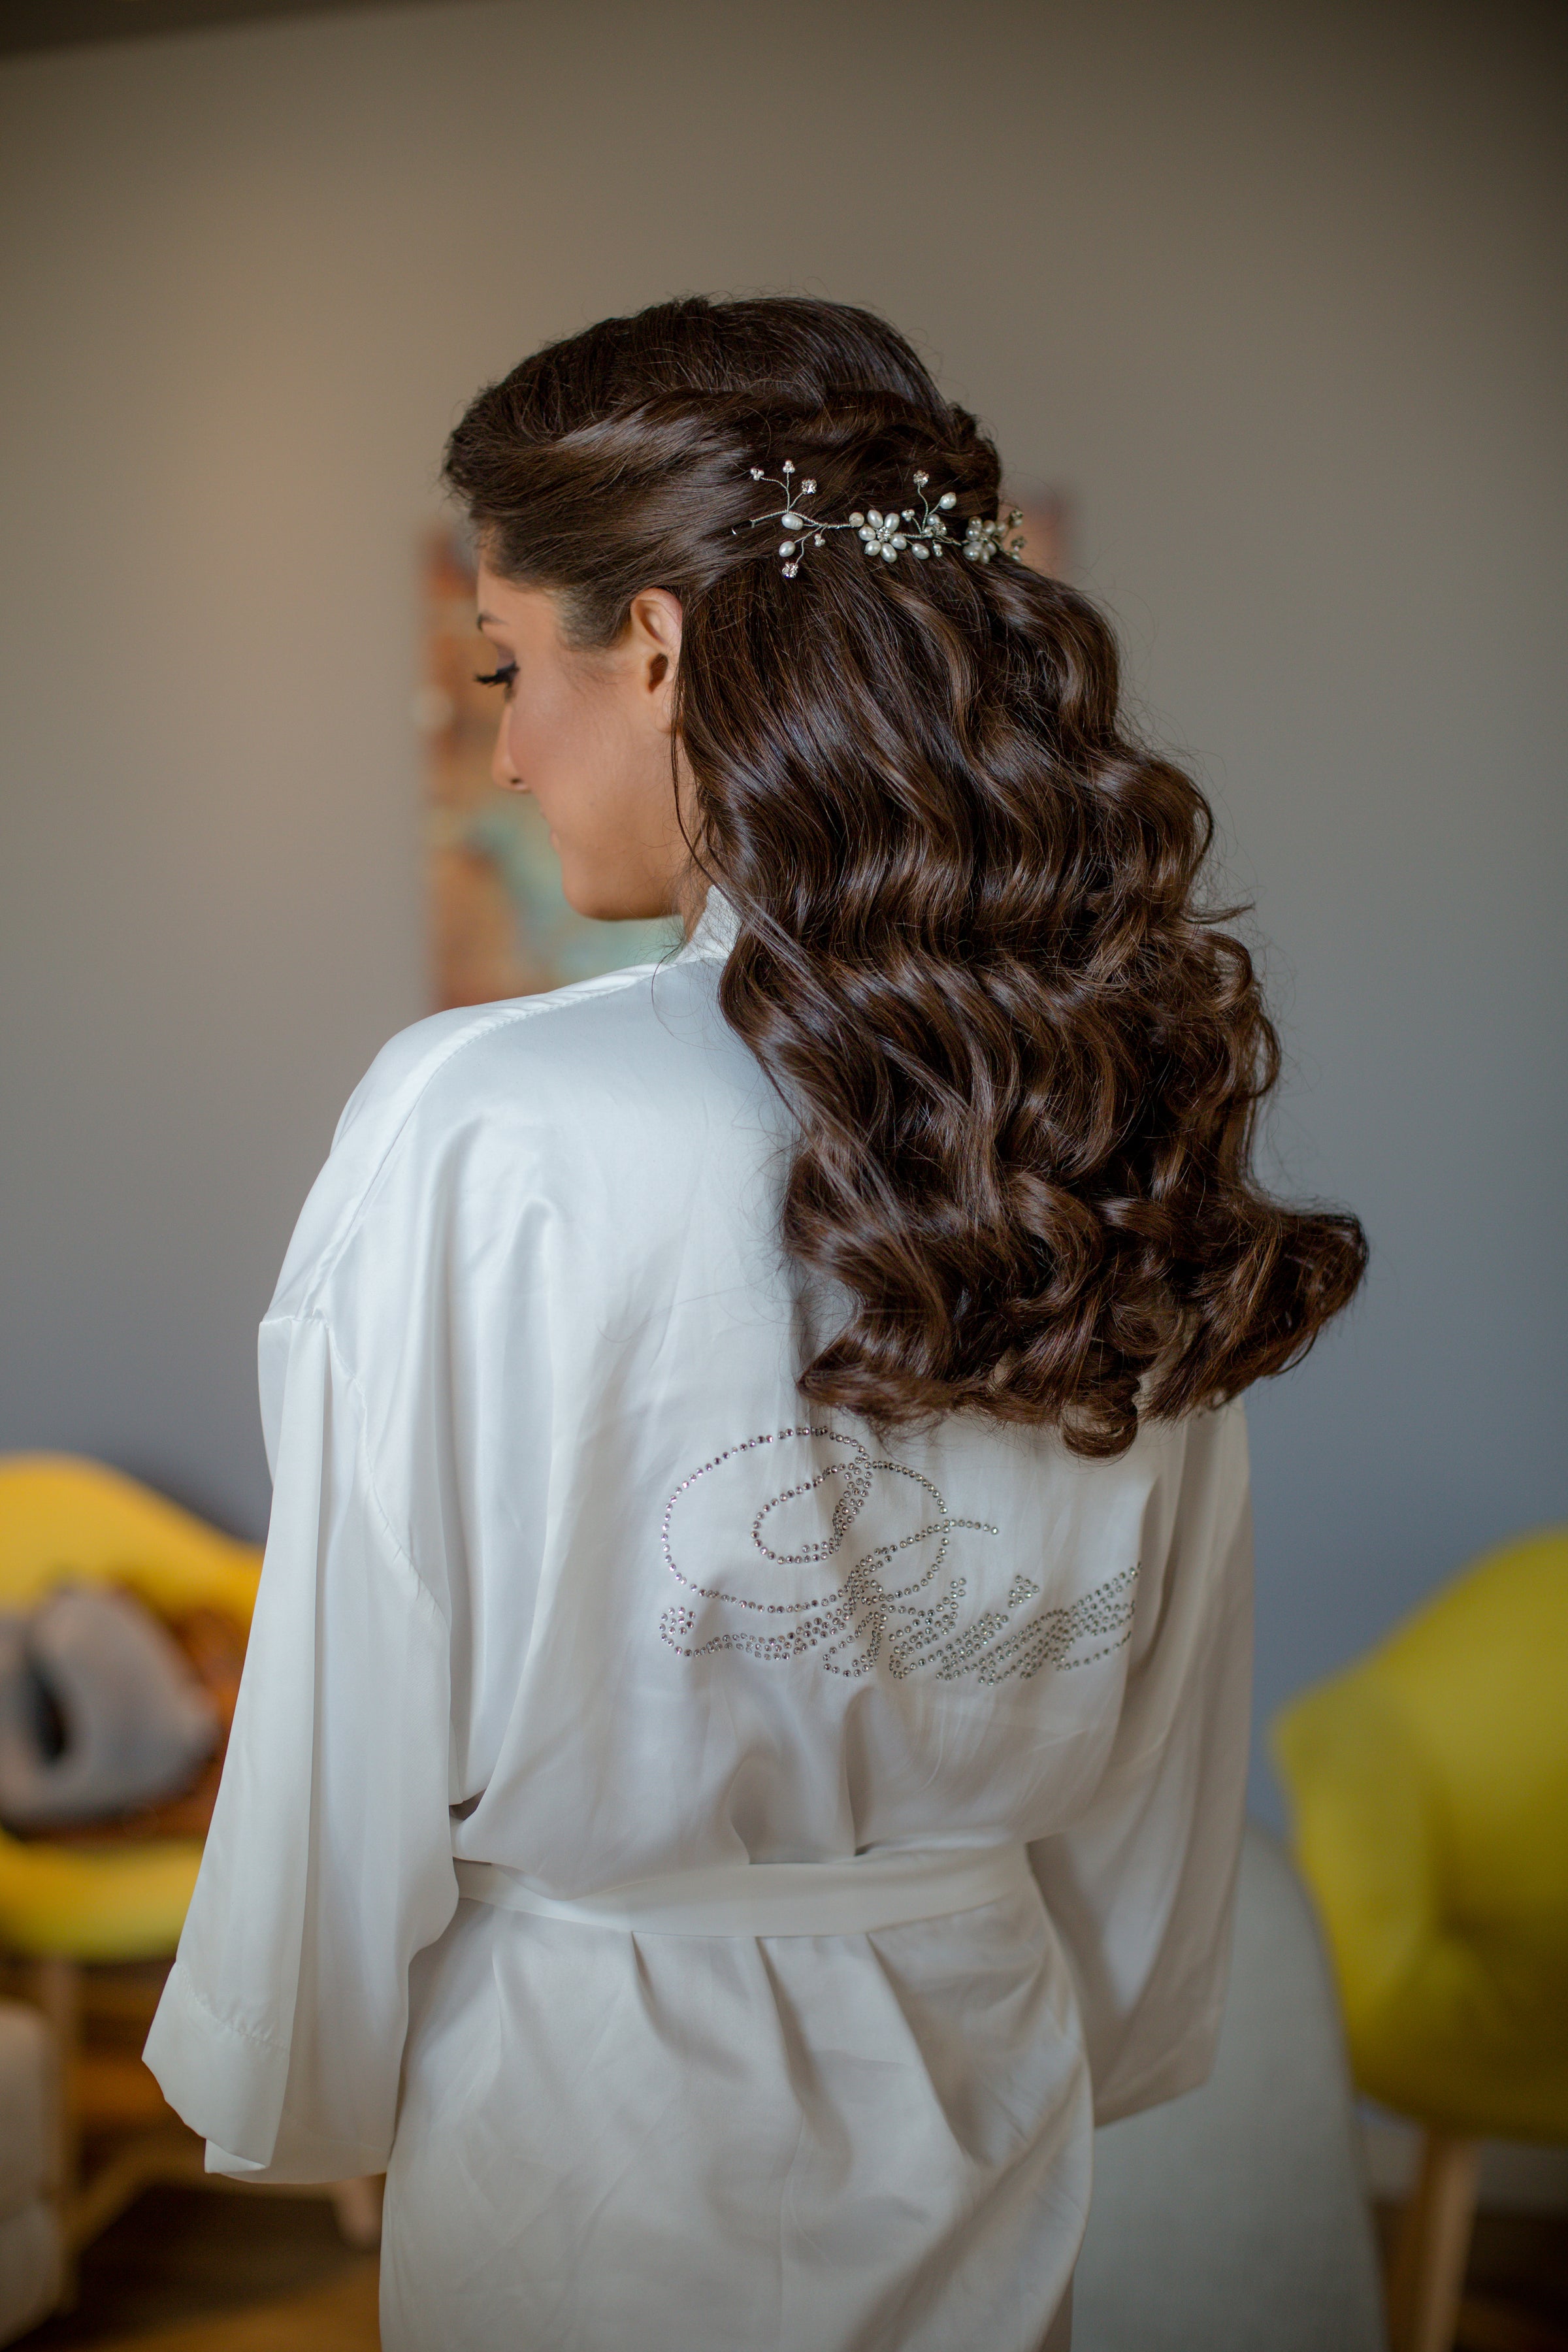
For a chic and polished appearance during a night out on the town, a sleek high ponytail is a go-to option. Smooth back your hair, secure it at the crown of your head, and wrap a strand around the base for an added touch of elegance. This style is not only fashionable but also practical, keeping your hair off your face as you dance the night away.

Creating a sleek high ponytail for a night out can be a chic and elegant hairstyle. Here's a step-by-step guide to achieve this look:

What You'll Need:

  • Hairbrush/Comb: To detangle your hair.
  • Hair Tie: Use a strong, non-damaging hair tie to secure the ponytail.
  • Hair Gel or Pomade: For a sleek finish and to tame any flyaways.
  • Hair Spray: To set the style in place.
  • Hairpins/Bobby Pins: For securing any loose strands.
  • Optional: Hair Extensions/Accessories: To add length or extra style.

We will go through this step-by-step instruction, the same like the previous hair style, we will go through these 9 step:

1. Start with Clean, Dry Hair:

Ensure your hair is clean and completely dry before styling.

2. Detangle Your Hair:

Use a comb or brush to remove any knots or tangles from your hair.

3. Apply Hair Gel or Pomade:

Apply a small amount of hair gel or pomade to your hands and run it through your hair. Focus on the crown and sides to achieve a sleek look. This will help control frizz and give your hair a polished appearance.

4. Gather Your Hair:

Tilt your head back slightly and gather all your hair at the crown of your head. Use your fingers to smooth the hair and create a neat, tight grip.

5. Secure with a Hair Tie:

Once you've gathered your hair, secure it with a strong hair tie. Make sure it's tight enough to hold the ponytail in place but not so tight that it causes discomfort.

6. Smooth and Tighten:

After securing the ponytail, use a comb to smooth out any bumps or lumps. If needed, tighten the ponytail by pulling the hair tie slightly.

7. Conceal the Hair Tie:

Take a small strand of hair from the ponytail and wrap it around the hair tie to conceal it. Secure the end of this strand with a bobby pin.

8. Address Flyaways:

Apply a bit more hair gel or pomade to your fingertips and gently smooth down any flyaways or frizz. This step helps achieve a polished and sleek finish.

9. Optional: Add Extensions or Accessories:

  • If you want to add length or extra style, consider using hair extensions or adding accessories like hairpins, barrettes, or a decorative hairband.
  • Spritz some hairspray over your sleek high ponytail to set the style and ensure it stays in place throughout the night.

Effortless Messy Bun for Casual Days:

  • On days when you want a laid-back yet stylish look, the messy bun is your best friend. Achieve this undone perfection by loosely pulling your hair into a bun, allowing a few strands to frame your face. It's the ideal hairstyle for a casual day out or when you're running errands but still want to look effortlessly chic.

What You'll Need:

  • Hair Tie or Scrunchie: Use a soft and loose hair tie to avoid creating tension on your hair.
  • Hairbrush/Comb: For detangling your hair.
  • Texturizing Spray or Dry Shampoo: Optional, for added texture and volume.
  • Bobby Pins: To secure loose strands and shape the bun.
  • Optional: Hair Accessories: You can add hairpins, clips, or a headband for extra flair.

First, we will take a look through step-by-step instructions:

1. Start with Dry Hair:

Begin with dry hair. If your hair is too clean or slippery, you may want to add some texture using texturizing spray or dry shampoo.

2. Brush and Detangle:

Use a hairbrush or comb to gently brush through your hair and remove any knots or tangles. This will make it easier to create a smooth base for your messy bun.

3. Gather Your Hair:

Flip your head upside down and gather your hair into a high ponytail at the crown of your head. Use your fingers to gather the hair rather than a comb for a more relaxed look.

4. Secure with a Loose Hair Tie:

Use a soft and loose hair tie or scrunchie to secure the ponytail. Keep it slightly loose to maintain the effortless and relaxed feel of the messy bun.

5. Create the Bun:

Twist the ponytail loosely and wrap it around the base to form a bun. Don't worry about making it too neat – the key is to keep it relaxed and slightly undone. Feel free to customize it based on your preferences and the level of "messiness" you prefer.

6. Secure with Bobby Pins:

Use bobby pins to secure the bun in place. Allow some pieces to stick out for that intentionally messy appearance.

7. Pull Out a Few Strands:

Gently pull out a few strands of hair around your face and from the bun to enhance the messy and casual look.

8. Optional: Add Accessories:

If you like, you can add some hair accessories like clips or pins to add a touch of style to your messy bun.

9. Set with Hair Spray:

If desired, you can use a light-hold hairspray to set the style in place. However, keep in mind that a bit of looseness adds to the charm of the messy bun.


Braided Elegance:

  • Braids continue to dominate the hairstyling scene in 2024. Experiment with intricate braiding techniques such as fishtail braids, Dutch braids, or even a bohemian-inspired crown braid. These styles add a touch of romance and flair to your overall look, making them perfect for special occasions or when you simply want to showcase your creative side.

What You'll Need:

  • Comb or Brush: To detangle your hair.
  • Hair Ties or Clear Elastics: For securing sections of hair.
  • Bobby Pins: To secure the braids in place.
  • Hair Spray or Hair Gel: For a polished finish.
  • Optional: Hair Accessories (pins, flowers, etc.): To add extra flair.

These step-by-step instructions will show you how to create a beautiful braided hairstyle:

1. Start with Clean, Dry Hair:

Begin with clean and dry hair. If your hair is freshly washed, you might want to add a bit of texturizing spray or mousse to give it some grip.

2. Part Your Hair:

Create a part that suits your preference. You can go for a middle part, a side part, or a deep side part depending on your style.

3. Detangle Your Hair:

Use a comb or brush to detangle your hair thoroughly, ensuring it's smooth and free of knots.

4. Section the Hair:

Divide your hair into three sections: left, right, and back. You can use the end of a comb to create clean sections.

5. Start the Side Braids:

Take a small section of hair from the front on one side and begin braiding. You can choose between a classic three-strand braid or a more intricate fishtail braid, depending on your preference.

6. Repeat on the Other Side:

Create a similar braid on the opposite side of your head. Make sure the braids are relatively symmetrical for a balanced look.

7. Combine the Braids at the Back:

Bring both braids to the back of your head and secure them together with a small hair tie or clear elastic.

8. Create a Bun:

Twist the remaining hair (including the braids) into a bun. You can go for a low bun for an elegant look or a higher bun for a more playful style.

9. Secure with Bobby Pins:

  • Use bobby pins to secure the bun in place. Tuck in the ends of the braids to conceal them within the bun.
  • Smooth out any flyaways with a bit of hair gel or hairspray. You can also add any desired hair accessories, such as decorative pins or flowers.
  • Spritz a light-hold hairspray over your braided elegance hairstyle to set it in place and add shine.

Accessorize with Statement Hair Clips and More:

  • The last style will be based on your imagination and also any Instagram-inspired hairstyle, you can apply hair clips or ribbons, anything that you have at your home!
  • Elevate any hairstyle by incorporating special stylish hair accessories and hair extensions. Statement hair clips, adorned with pearls, rhinestones, or unique designs, are a huge trend this year. Whether you're rocking a sleek bob or cascading curls, these accessories add a touch of glamour and personality to your look.

Step-by-Step Instructions:

1. Choose Your Statement Hair Clips:

Select one or more statement hair clips that complement your outfit and the look you want to achieve. Popular options include oversized clips, decorative pins, or clips with unique shapes and designs.

2. Prepare Your Hair:

Start with clean and dry hair. Use a comb or brush to detangle your hair, ensuring a smooth base for styling.

3. Decide on the Hairstyle:

Decide on the trending hairstyle you want to create. Statement hair clips work well with various styles, such as:

  • Half-Up Hairstyle: Gather the top section of your hair and secure it with a hair tie or pins. Attach the statement clip above the tie or pins for added flair.
  • Low Ponytail or Bun: Create a low ponytail or bun and place the statement clip above or below the hair tie or bun for a chic look.
  • Side Swept Hairstyle: Sweep your hair to one side and secure it with pins if needed. Place the statement clip on the opposite side for an asymmetrical touch.

4. Position the Statement Hair Clips:

Place the statement hair clips strategically in your chosen hairstyle. You can position them close together for a bold statement or scatter them for a more subtle effect.

5. Secure with Bobby Pins:

If your hair clips need extra support, use bobby pins to secure them in place. This is especially important for heavier or larger clips.

6. Adjust and Tweak:

Take a moment to adjust the placement of the hair clips and ensure they are balanced. Tweak your hairstyle to achieve the desired look.

7. Optional: Set with Hair Spray:

If you want to ensure your hairstyle stays in place throughout the day or night, you can use a light-hold hairspray to set the style without making it too stiff.

8. Showcase Your Style:

Let your statement hair clips take center stage and showcase your unique style. Whether you're going for a minimalist or bold look, make sure the clips enhance your overall appearance.


Conclusion:

In 2024, hairstyling is all about embracing versatility and expressing your unique personality. Whether you're attending a party, going out for the night, or simply exploring new styles at home, these hairstyle ideas offer a blend of elegance, trendiness, and practicality. Dare to experiment, and let your hair become a canvas for self-expression and style in the coming year!


Leave a comment

Please note, comments must be approved before they are published

This site is protected by reCAPTCHA and the Google Privacy Policy and Terms of Service apply.